【Windows】【cmd】bcdedit 用法整理
概述:bdcedit用法整理|双机调试
更多命令:https://docs.microsoft.com/zh-cn/windows-hardware/drivers/devtest/bcdedit–bootdebug
[toc]
禁用数字签名
1 | |
windows操作提供内核调试
1 | |
windows操作系统启动项的启动调试
1 | |
永久禁用数字签名方法
- 管理员CMD
- 输入
bcdedit.exe /set nointegritychecks on,执行完毕就结束了 - 如果要恢复签名,执行
bcdedit.exe /set nointegritychecks off就行
windbg和虚拟机的远程调试和网络调试设置
参考:windbg和虚拟机下的远程调试和网络调试设置_windbg调试虚拟机_satadriver的博客-CSDN博客
微软官方文档:BCDEdit /dbgsettings - Windows drivers | Microsoft Learn
WDF双机调试
参考:WDK1.2. bcdedit调试配置_bcdedit /dbgsettings hostip_ljymoonlight的博客-CSDN博客
双机调试基本步骤
网络连接
使用 Net 进程双机调试的配置步骤
虚拟机设置
1 | |
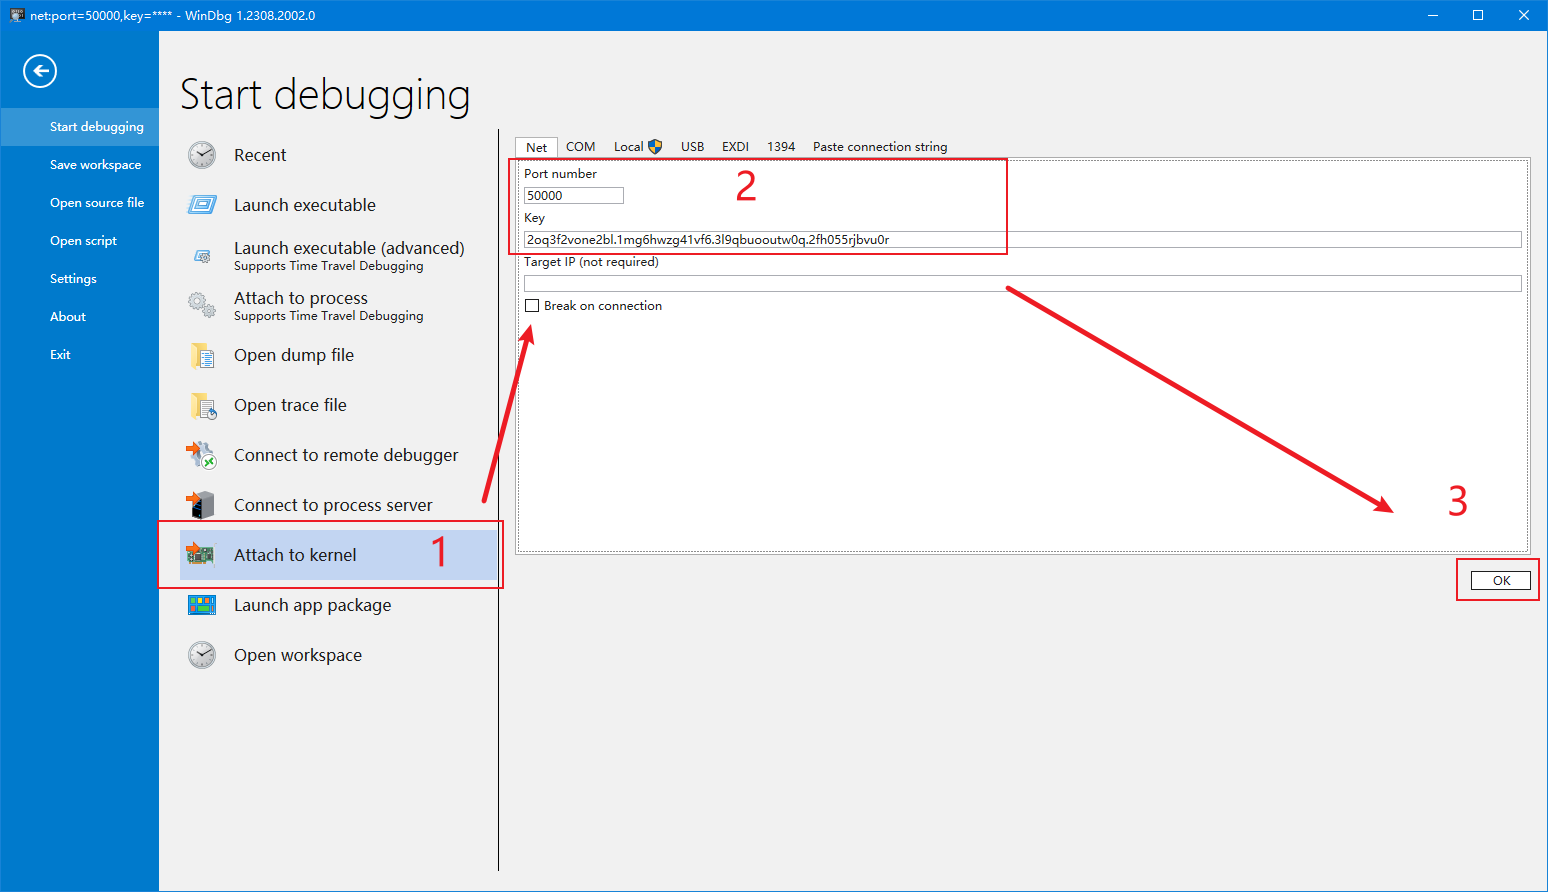
主机windbg连接虚拟机
如下图所示填入上述得到key或自定义设置的key之后连接即可。
串口调试
使用串口进行双机调试的步骤。
- 添加串行调试端口
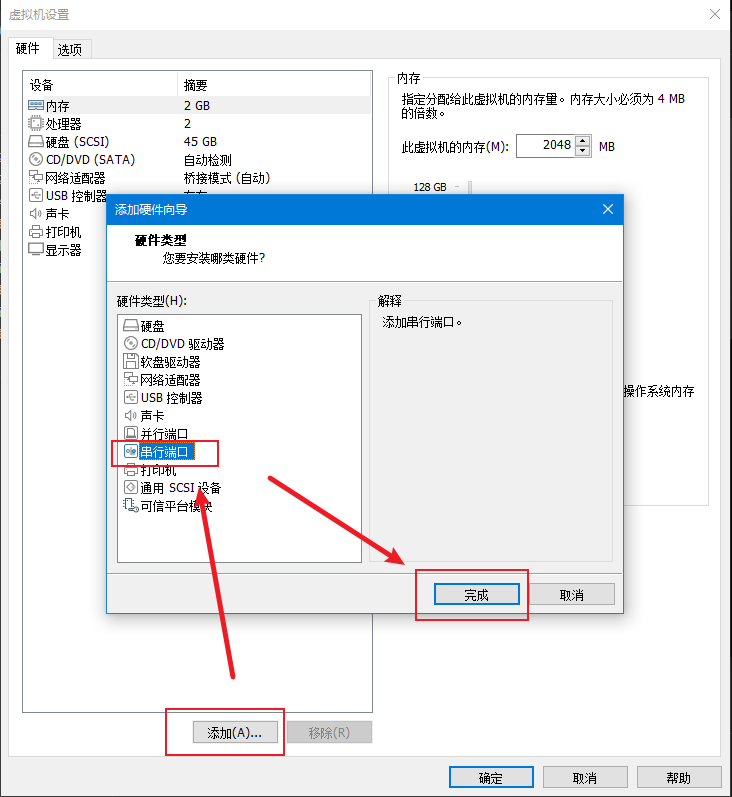
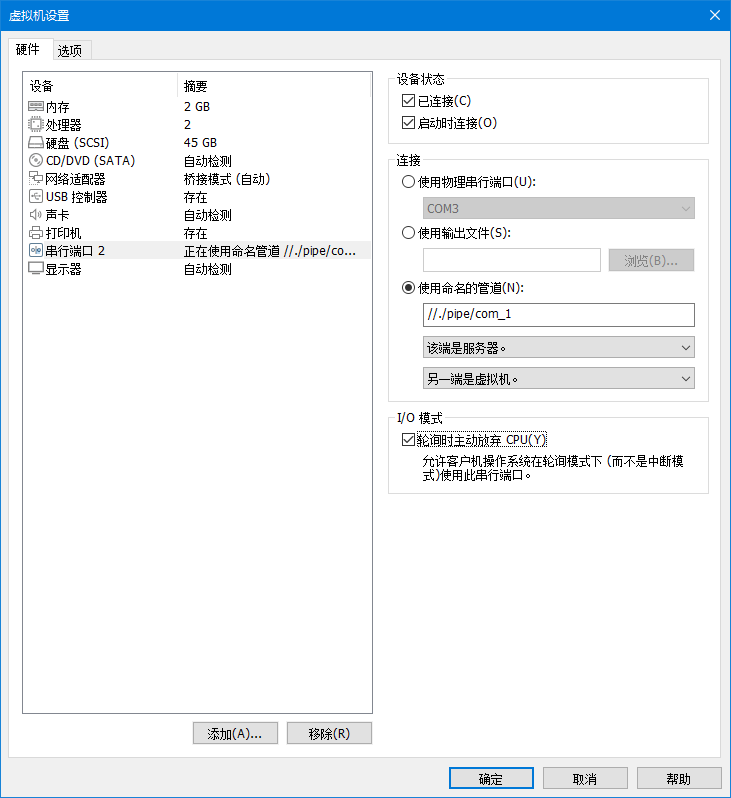
- 设置管道名,并删除打印机
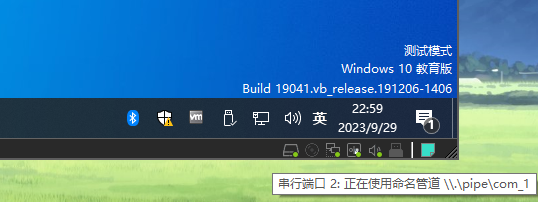
- 查看管道名
虚拟机设置
-
管理员cmd
-
依次输入以下指令
1
2
3
4
5# 添加新的引导项
bcdedit /copy {current} /d Debug
# 设置引导项等待时间
bcdedit /timeout 30 -
重启操作系统并再次管理员运行CMD
-
依次输入以下命令
1
2
3
4
5bcdedit /dbgsettings SERIAL DEBUGPORT:1 BAUDRATE:115200
bcdedit /bootdebug on
bcdedit /debug on -
运行
msconfig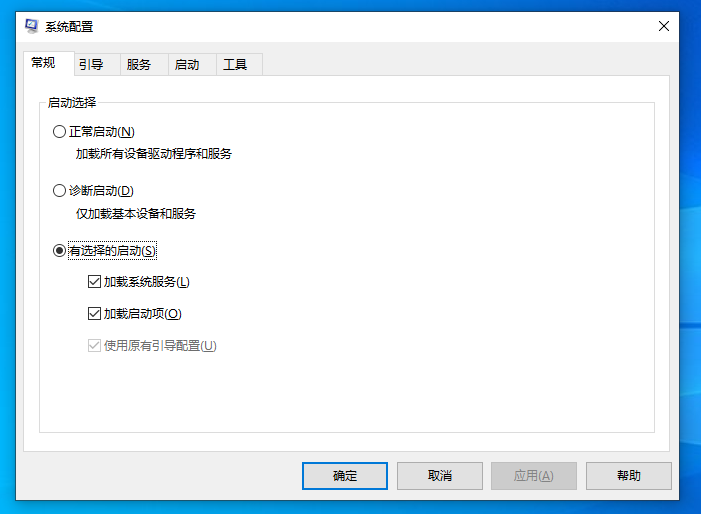
- win+R 输入 msconfig
- 查看引导项是否有Debug模式
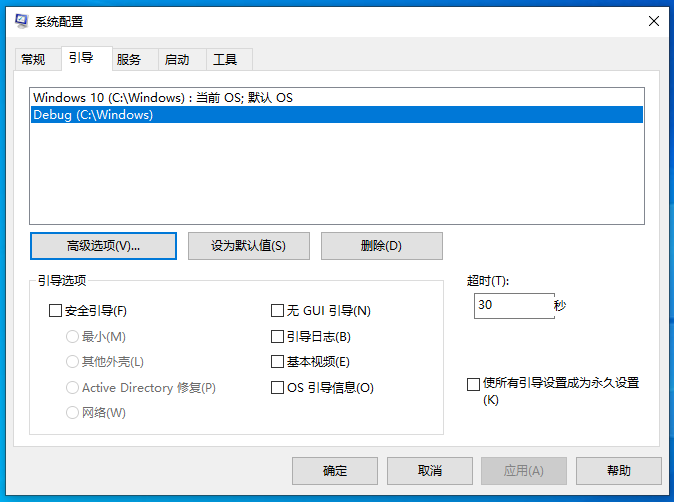
- 查看高级选项,调试端口和波特率
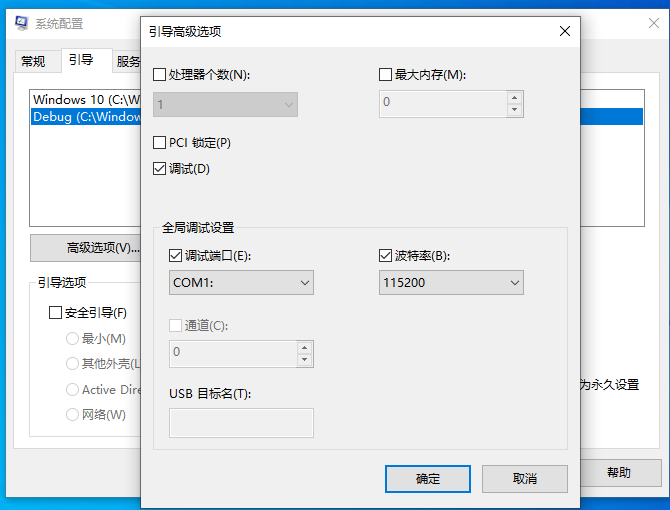
-
到此为止,虚拟机设置完毕,启动后操作系统启动时选择
Debug
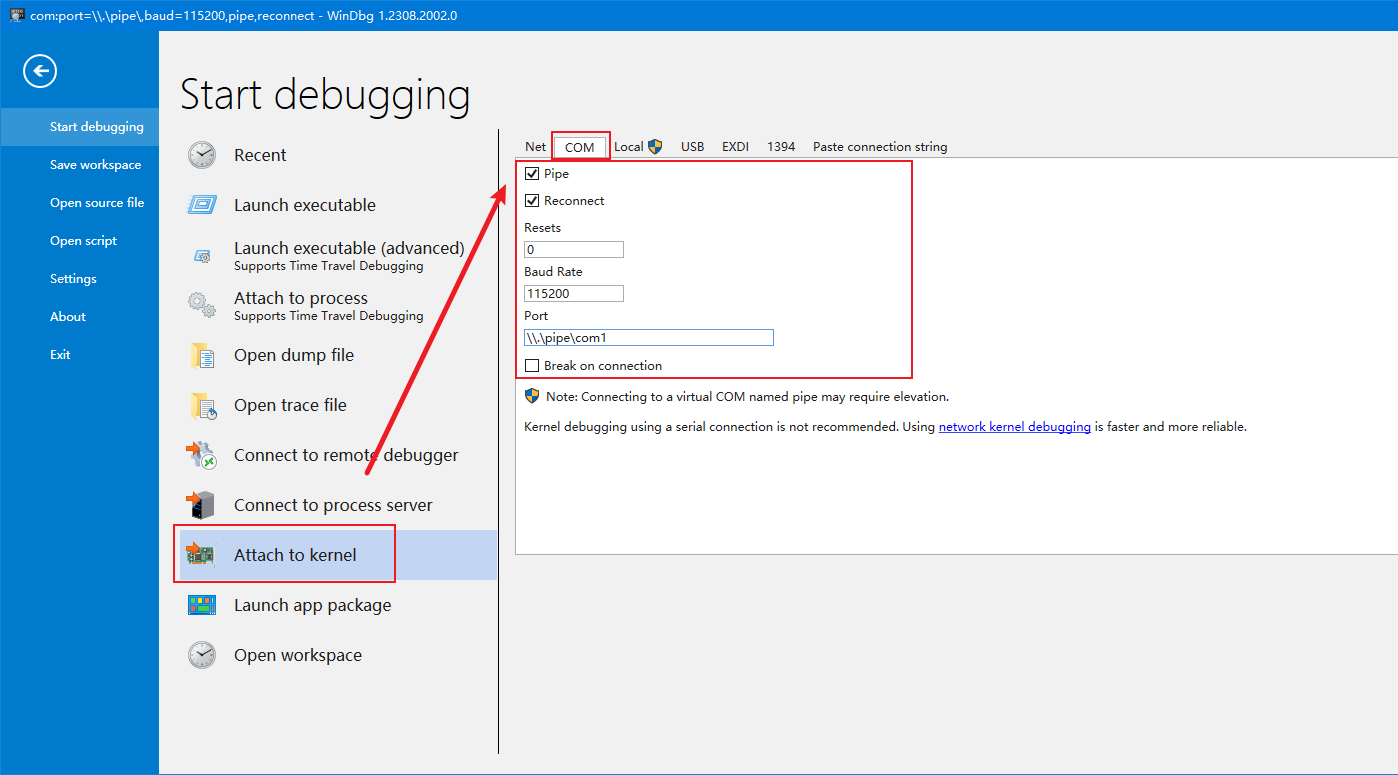
Windbg连接
- 连接内核
- 设置管道名
【Windows】【cmd】bcdedit 用法整理
https://hodlyounger.github.io/2024/10/18/A_OS/Windows/cmd/【Windows】【cmd】bcdedit/